Our top-tier consultancy services provide strategic guidance to elevate your entire digital presence.
Learn More
 " />
" />
 " />
" />
 Lyana
|
February 19, 2021
|
Design
Lyana
|
February 19, 2021
|
Design

Contents
Images are an essential part of the design. You can see them virtually and digitally in ads everywhere you go. I know, it’s crazy when you think of how many ads are placed around the world. Frankly, there are a lot of graphic design and creative people out there who are having similar problems. Often, we have to design something that is based on a lot of stunning, eye-catching pictures. Most of the time we do receive amazing, spectacular images, but like any other work, it comes with its difficulties. For example, clients are sending low-resolution photos or perhaps low-resolution photos from one of your projects. It is every designer’s nightmare to go back and forth with a client for a picture. The problem with this is that it is becoming increasingly difficult to work with low-resolution images, particularly when it comes to printing & graphics. It is not a miracle, but these helpful tips will increase the quality of a picture if we convert low-resolution sample images. We are going to keep these steps simple and straightforward to follow. So let’s get started!
First, open your photo in Photoshop CC. It can be any version of it. Once you have the file opened, find the image size of that particular image. To find the image size, open the image size dialogue box.
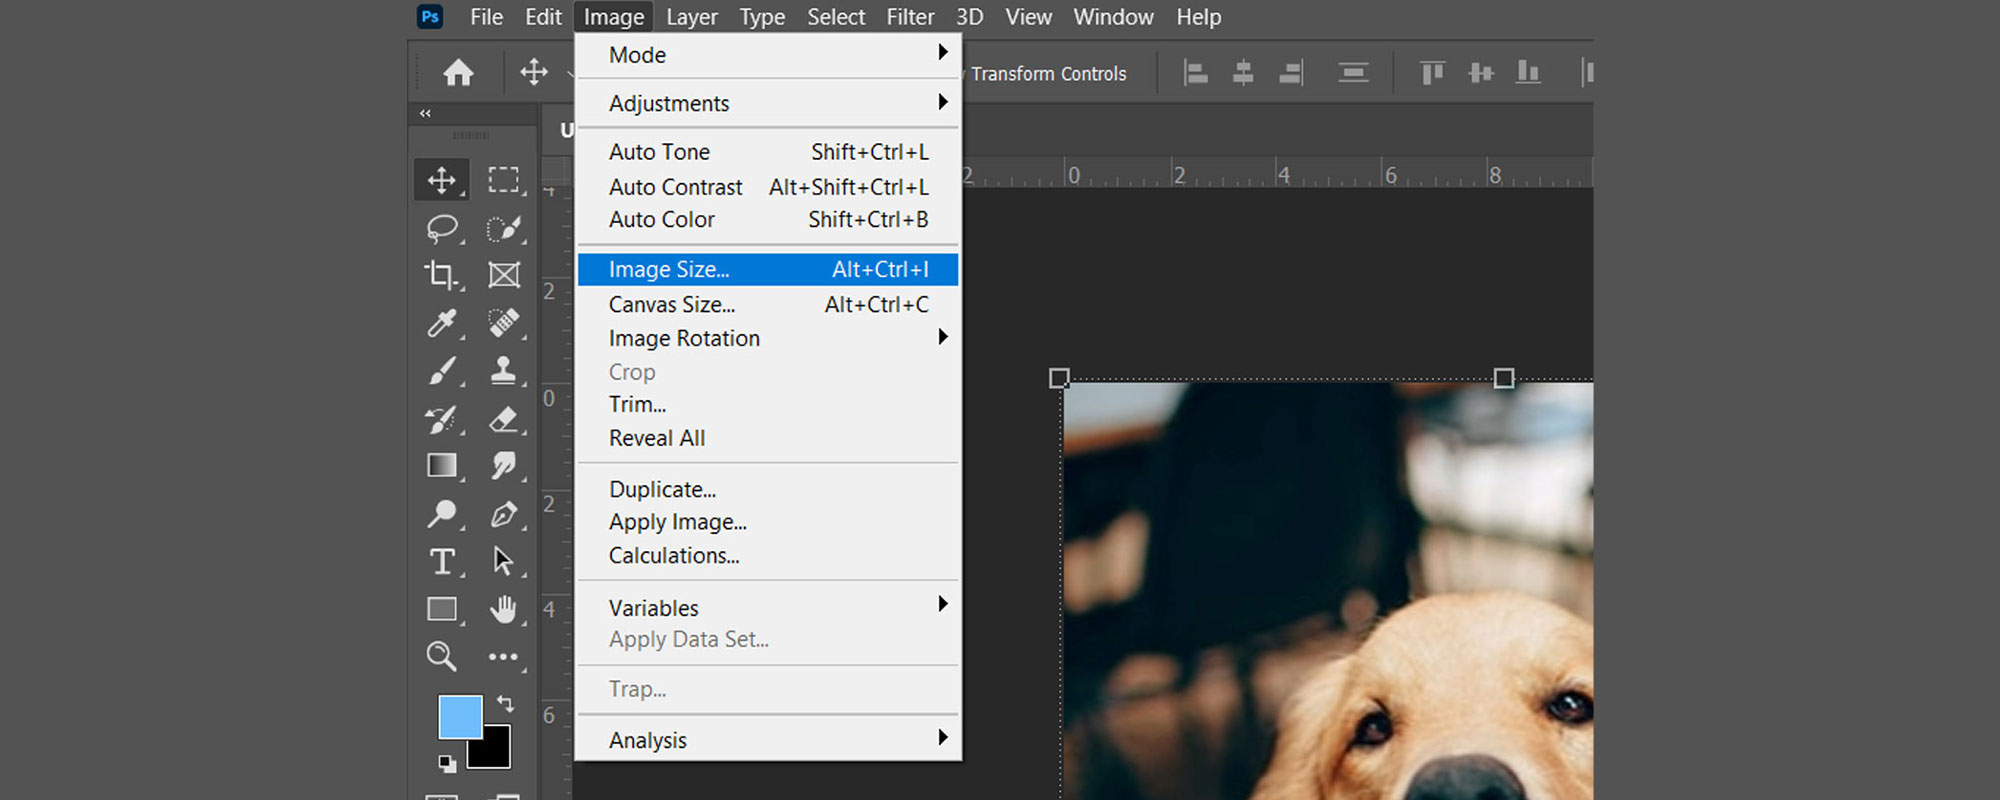
Go to Image > Image Size… You may find and look at the example above;
You will be able to find your image size in this dialogue box. And, you will see a width and height in pixels dimension. Also, Adobe Photoshop has set the default size to pixels. But, you can change it to inches, centimetres, or even a percentage. In this window, we will use these tools to adjust the picture resolution.

As you can see, the image quality is in low-resolution mode. So let’s improve it with the basic enlargement of the sizes of the picture. There are a few options that you can follow to change the resolution of your image depending on what mediums or presets you want it to be.
But In this case, if you are aiming at posting the image online or digitally, it is better to set the size of the image yourself instead of sticking to the standard size. So just simply fill the sizes you like over the current size of the photos. Photoshop will automatically adjust the height to ensure the picture ratio stays the same when you enter a number to alter the width. If you want to change the width and height of the pixel dimensions separately, click on the icon that looks like a chain connecting the two dimensions. This will tell Photoshop to turn off the auto-ratio settings on the image.
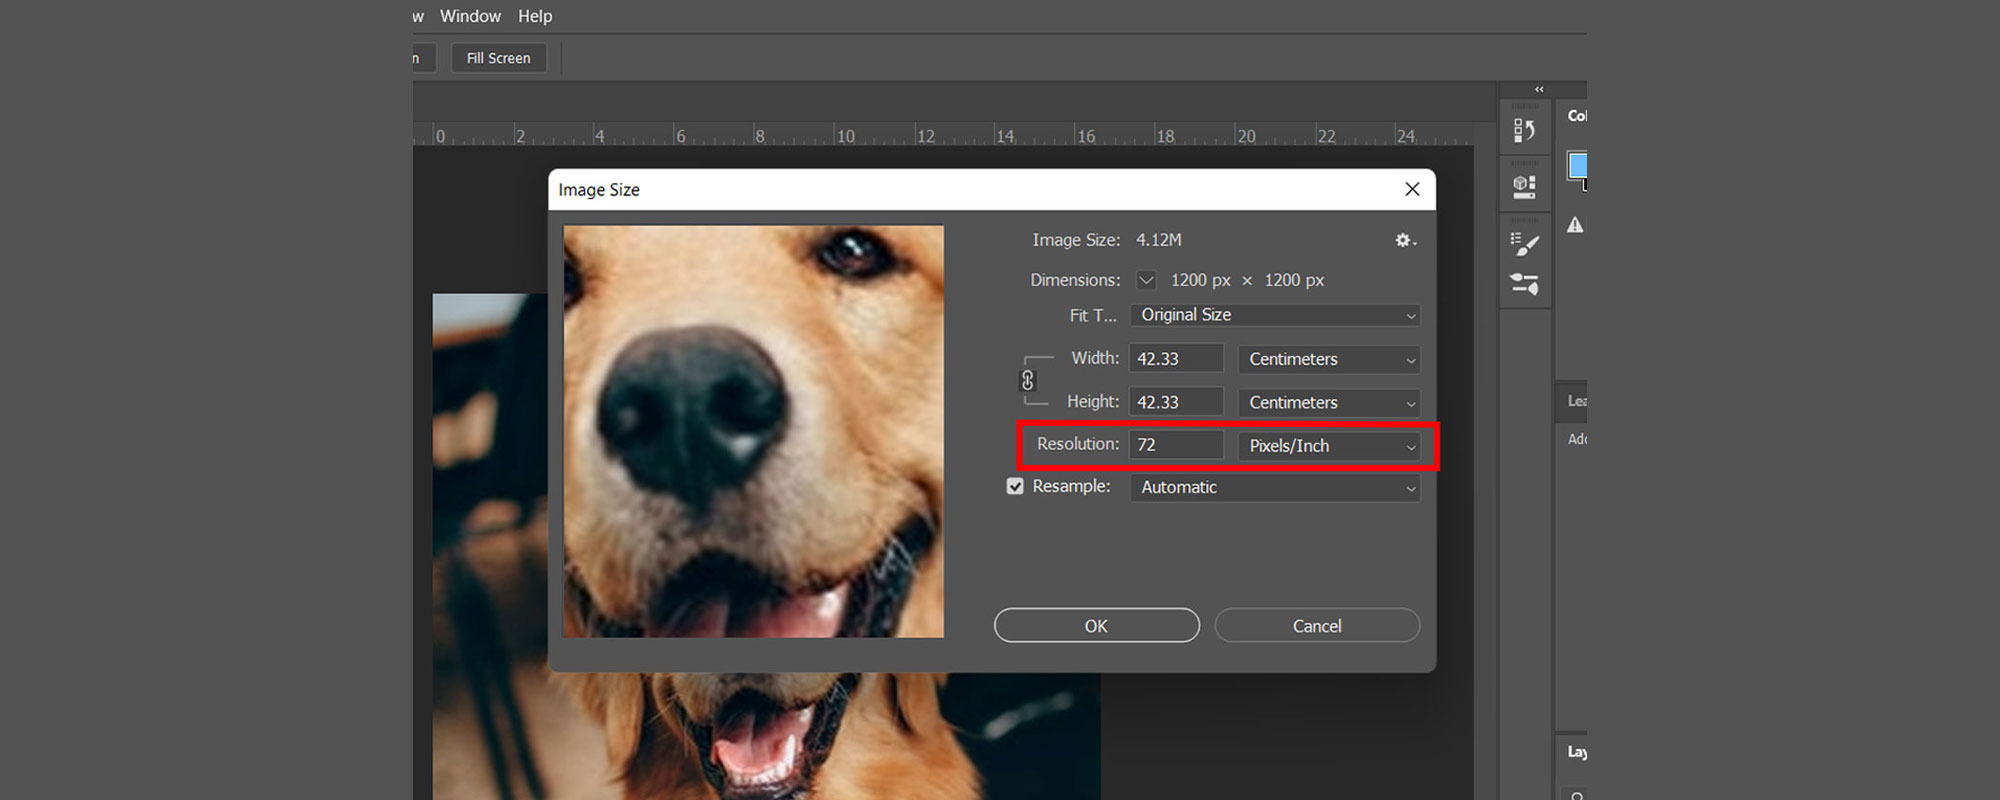
Set the amount of pixels per inch in the image resolution box. There are many preferences in multiple online forums on the discussion of the best DPI (Dots Per Inch) that produces the optimum quality, however, the most commonly agreed number for print images would be 300 DPI. For the printing of pictures, 300 DPI is the norm. However, 72 DPI are used in most displays for online images, which can be viewed only through a computer screen size.
Regardless of whether you are using 300 or 72 DPI, keep in mind that the image quality will look the same when viewed on a screen. The obvious difference is only notable when you print the image.
The image size will change as you adjust the DPI of the image. Your picture might be half the size if you change the field from 300 DPI to 150 DPI. In this situation, your document will change its size as well due to the fact that the image has less information overall to store with fewer pixels and all. Depending on the size of any low-resolution image, you can convert the image to high resolution without losing the quality of the image. That said, it will require certain files to be improved to satisfy your resolution requirements.
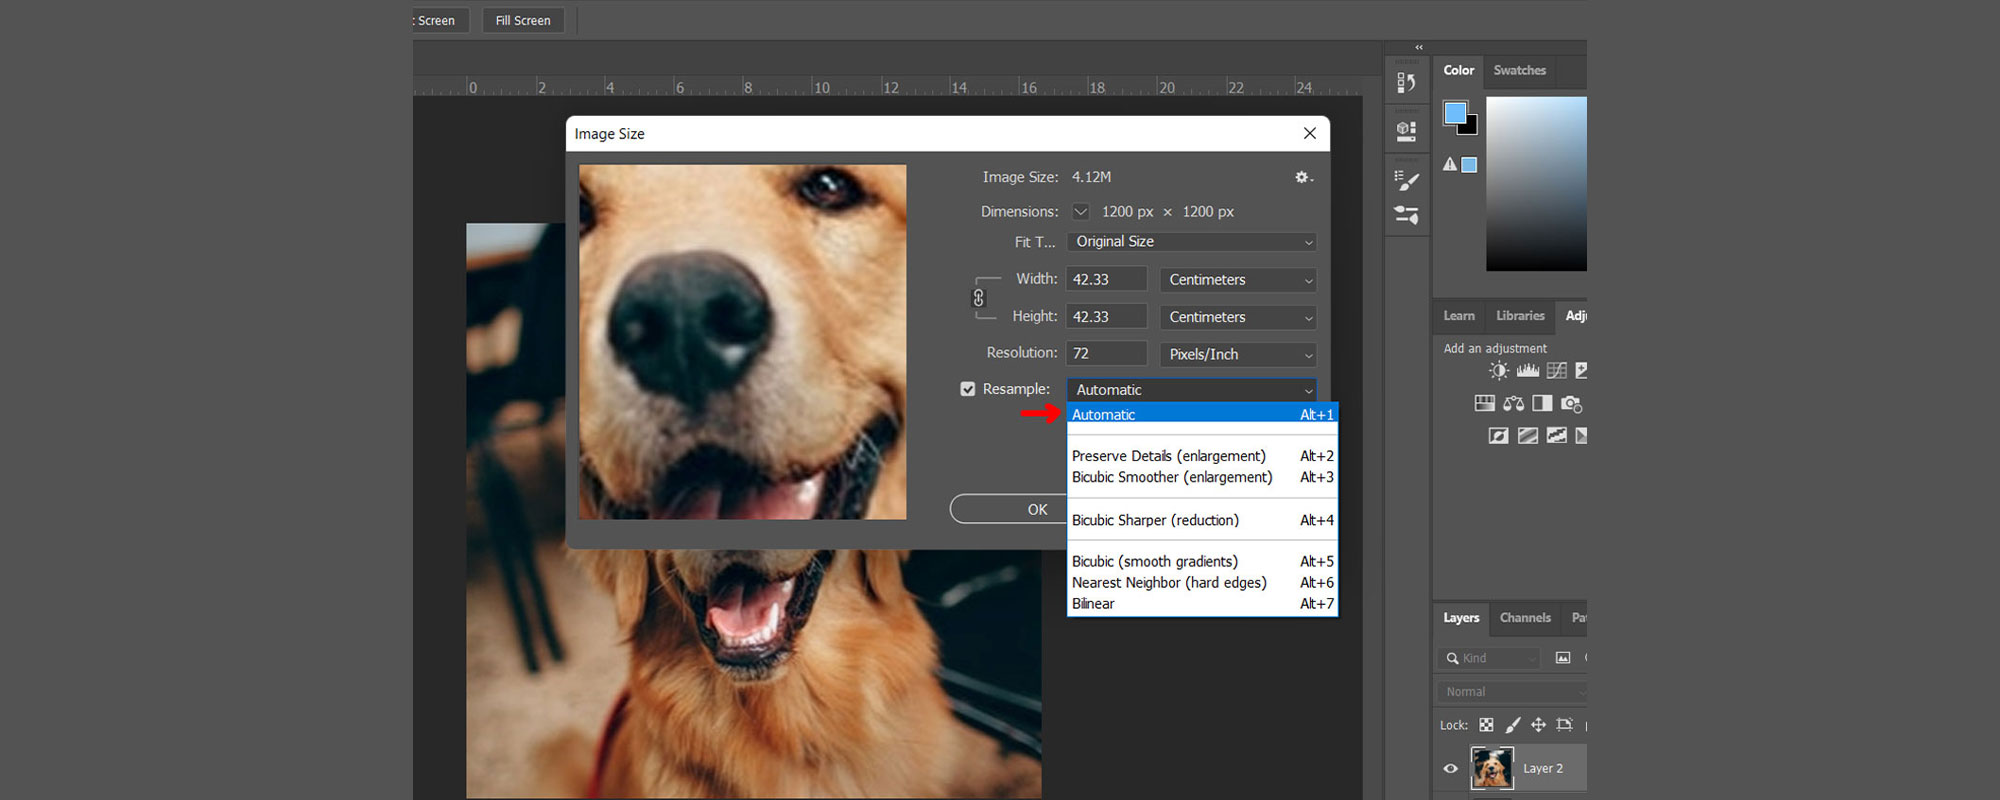
Resampling changes the amount of image data, either by changing the pixel dimension or by changing the image resolution. The resampling mode defines which Photoshop algorithm is used to add new pixels. Two excellent options available to increase the resolution are: “Preserve details 2.0” and “Bicubic smoother.”
If your resampling presets do not have “Preserve details 2.0” inside the box. Don’t worry about it, you just need to enable the presets in Adobe Photoshop preferences.


Go to Adobe Photoshop CC > Preferences > Technology Previews… and you will be able to find the “preserve details 2.0”. Click on the tick box button to enable the presets.
I notice that the best outcomes are ‘Preserve details 2.0.’ But keep in mind that not every image will be the way you wanted it to be. And, the results will not be 100% perfect. These depend on the image of your choices too. You can select and try other resampling modes that match and meet the requirements that you need.
Here comes the editing part, which is not difficult to handle, you just need to adjust a few more to make it look better than before. As for the refining touch, we will go with sharpening the photo to make it look real instead of blurry. You may want to adjust it by using the sharpen effects or you can go ahead and refine it using the Camera Raw filters.

Go to Filter > Camera Raw Filter… and it will open up the adjustment box.
After you finish sharpening the picture, you find that the picture still does not meet your requirements. Don’t worry because you can always edit it by using some other tools that you think fit your criteria or you can simply try using other tools like brushes to make it a little smoother. Overall, there are multiple image editing tools and options available in Photoshop that can help you produce the quality you are looking for.
As you can see, the difference can be seen in both pictures. If you change this form to Preserve Details 2.0, the edges in your images can make a big difference, and the noise correction can help to make it smoother. However, keep in mind, that form may affect resolution size.
It is easy to increase or decrease the image resolution from Adobe Photoshop. However, it does have some limitations. Your picture will determine if you get good results in quality and scale. For instance, a pixel picture of a small amount with 72 pixels cannot be resized to a high amount with 300 pixels per inch and look nice. It is just too much to ask. So, good luck and give it a go. Hopefully, these tips are helpful for you guys.
We get it. Graphic design can be a tricky beast to tame, especially when they’re crucial for your brand’s presentation.
But fear not! We’re here to save the day with our top-notch graphic design services. Whether you need crisp, high-resolution images for your website, social media, or marketing materials, we’ve got the skills and expertise to make it happen. Explore our complete range of Graphic Design Services now!
353-3 Jalan C. Y. Choy,
10300 Georgetown,
Penang, Malaysia.
A-16-8 Tropicana Avenue,
No 12 Persiaran
Tropicana, PJU 3, 47410
Petaling Jaya, Selangor.