Our top-tier consultancy services provide strategic guidance to elevate your entire digital presence.
Learn More
 " />
" />
 " />
" />
 Ivonne
|
November 29, 2021
|
Digital Marketing, Social Media Marketing
Ivonne
|
November 29, 2021
|
Digital Marketing, Social Media Marketing

Contents
Are you a new business owner to Meta or have been using your personal account to manage your page and run some basic ads? Then it is time for you to take your business to the next level with Meta by using Meta Business Suite, otherwise known as Meta Business Manager. If you have been delaying your set-up for Meta Business Suite because you are not too sure how it works, do not delay further with the range of useful tools that Meta Business Suite has provided and become a better Meta Business Partner. Firstly, let us walk you through the steps to setting up your Meta Business Suite.

According to Meta, Meta Business Suite is a one-stop-shop to manage business tools, business assets, and employee access to these assets which means Meta Ads, Meta Pages, and other Meta marketing efforts are overseen by Meta Business Suite. Meta Business Suite is where you should be leveraging your business to over 2 billion Meta customers if you are trying to do Meta marketing. With proper logins and permissions, you or your team members can use these tools to optimize your Meta Business Page. It allows you to generate greater returns based on your marketing goals.

Ads Manager is a Meta tool that allows you to create, manage and track how well your Meta and Instagram ads are performing. You can simply add a budget and schedule your ad campaigns according to your preferred demographics, geographic locations, and campaign goals.
1. It’s FREE! You do not have to pay anything to have a Meta Business Suite account. In fact, it is a solid reason why you should make full use of it.
2. With just one login, you can access several Meta Business Pages and Ad accounts with the assistance of Meta Business Suite. And from there, you can monitor the performance of your Meta page and Ads.
3. You can share and grant access to numerous individuals such as your employees or clients in a secure manner without disclosing login information.
4. You can control and toggle the amount of access given to each individual on your Meta Page.
5. You can connect and link your Meta Business Page to your Business Instagram Account.
6. You may easily schedule your content – posts, videos, stories on both social media platforms; Meta and Instagram.
7. Meta has enabled Two-Factor Authentication. Therefore, with this two-factor authentication system, you and your team members can rest assured that all your business assets and data are safe.
Get started with these steps to create your Business Suite Account
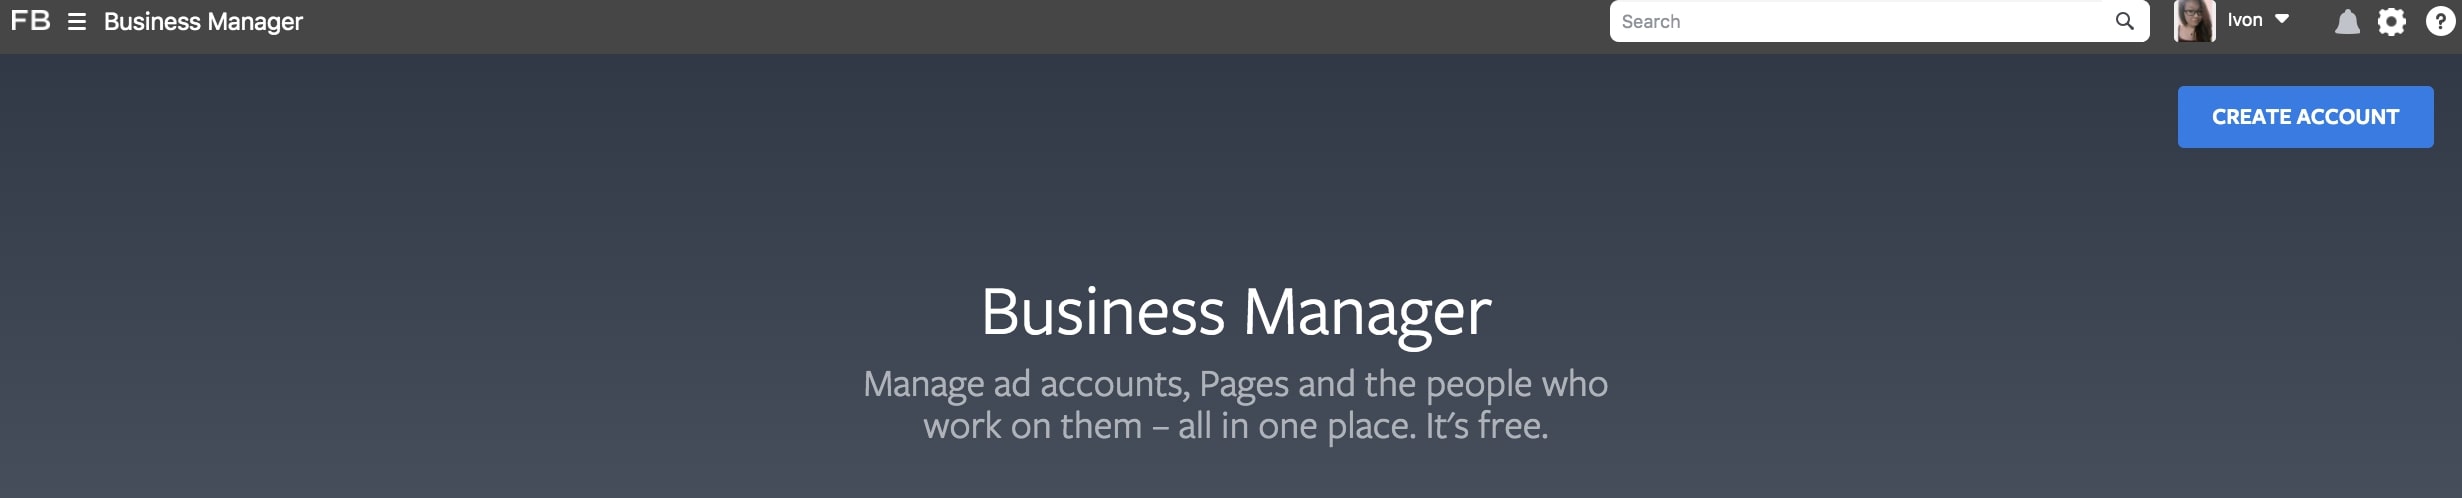
Start setting up your Business Manager with an account by visiting Business Suite. On the Business Suite page, if you already have an account, you may either select your profile on the top right of the page to choose an account. Or, if you are new to Meta Business, simply select the blue button “Create Account” to create a new account.
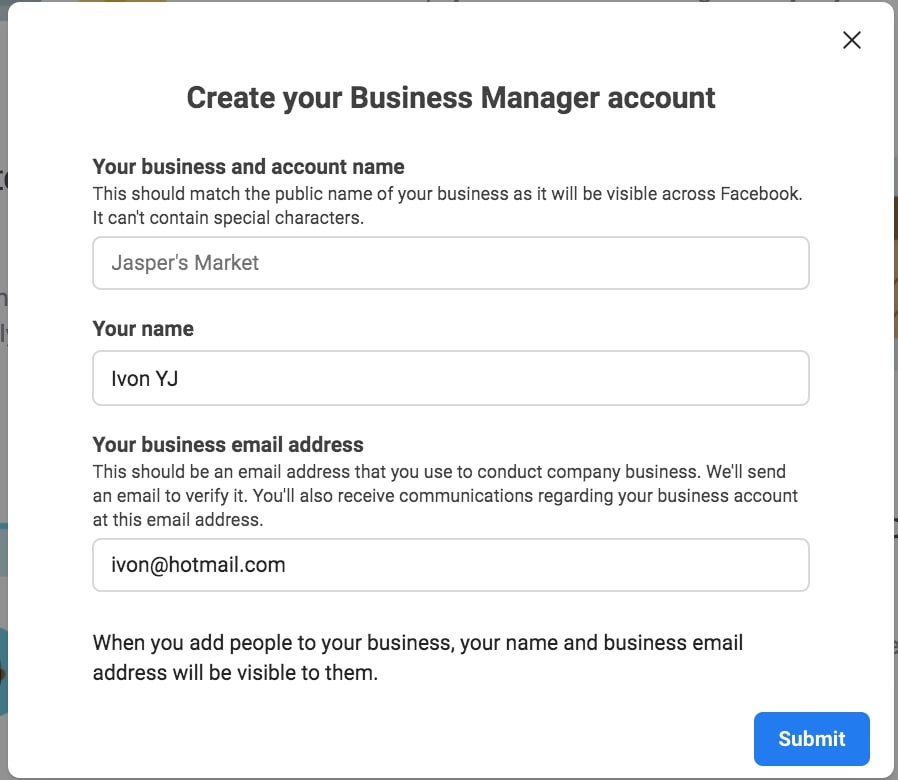
After selecting the “Create Account” button, enter your business name, your name, and business email address that will be used to manage your Meta Business Suite Account. Then click on the “Submit” button to submit your details.
After submitting your details, check your email. You will receive a verification email from Meta requesting you to verify your email address. Once you have verified your email, you are now granted full access to your dashboard.
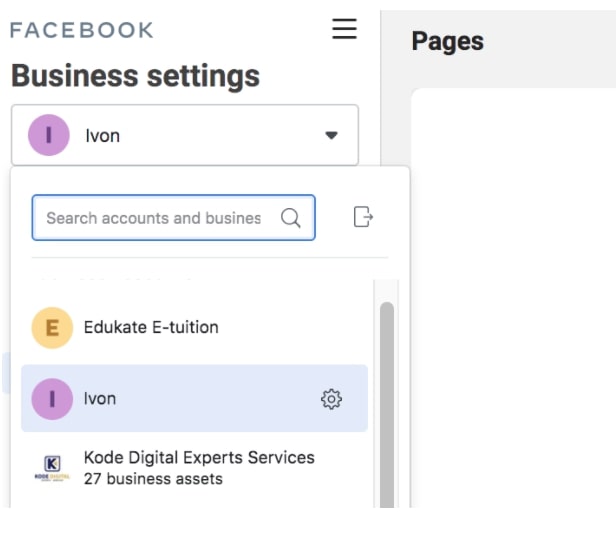
Note: If you are already using an existing account, you no longer have to go through the email verification process again. Both your accounts will be shown on your dashboard. You can simply select the dropdown menu next to your business name on the top left corner to switch accounts.
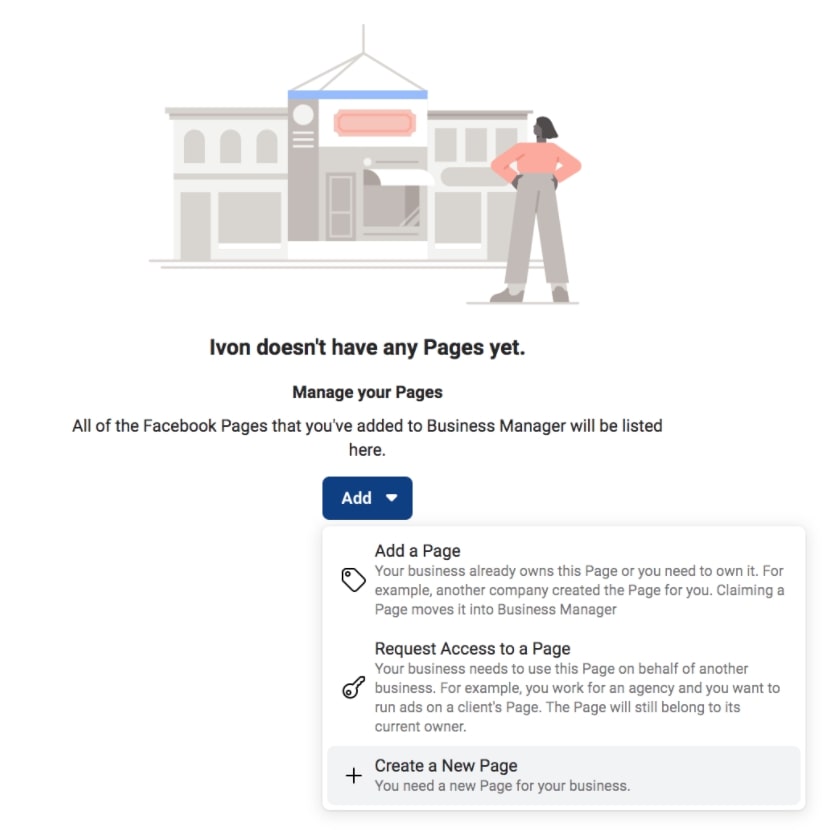
After creating an account, start adding your Meta Business Page. To add a Meta Business Page, select “Pages” at “Business Setting” on the left of your page.

There are a few options in this step.
Option 1: To create a new Meta Business Page, select “Create a New Page”. Next, choose your business “Category” then fill up other required information for your business and proceed with “Create Page”.


Option 2: If you already own a Meta page, select the “Add a Page” button. Then, insert the name of your preferred page and confirm by clicking “Add Page”.
To add more pages, simply repeat the same process by including the name of the pages.
Note: Your request will be approved automatically if you have administrator access to the page.


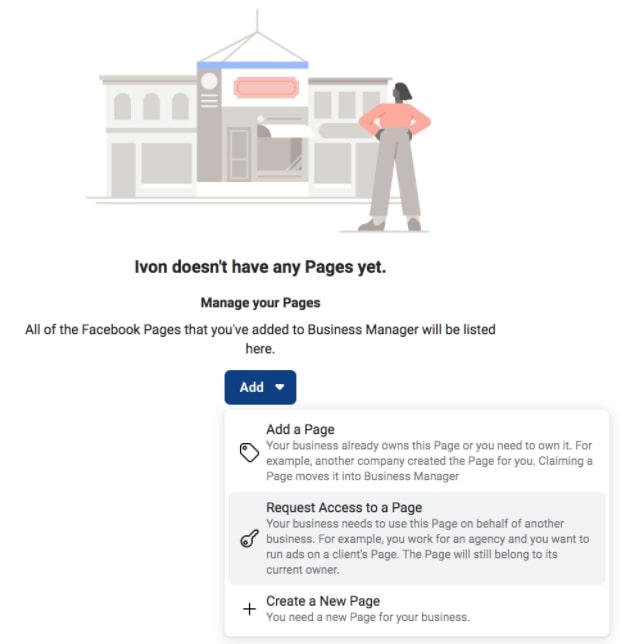
Option 3: However, if you are working with a client, you should request access to your client’s page to manage their Meta pages. When you have access, you may select the “Request Access to a Page” to “Add Page”, simply like Option 2.

After adding your page(s) to your Business Suite account, start setting up an ad account to start running paid campaigns. Even if you have not planned on running ads right away, setting up an Ad account now is worth it to ensure that everything is at least set up whenever you are ready to run ads.
On Business Setting, select “Ad Accounts”. Here, you have a few options as well.
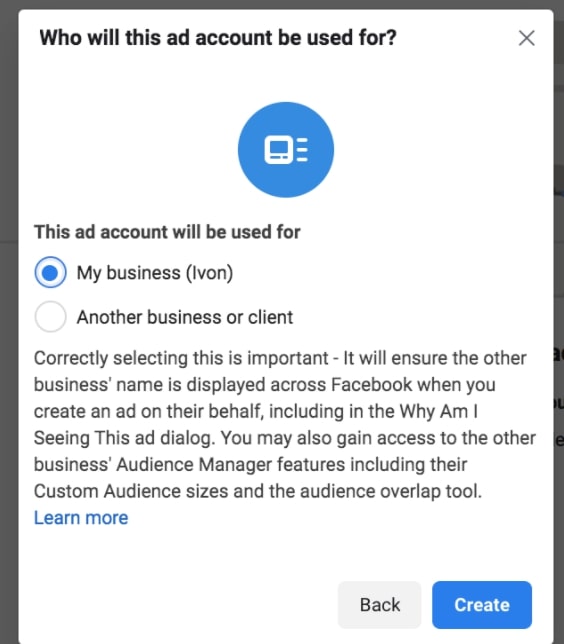
Option 1: To create a new ad account, select “Create a new ad account”. Then insert your ad account name, preferred time zone, and currency. Next, select to indicate who will this Ad account be used for – your own business or for a client, and you are ready to “Create”!
Note: You are only allowed to create or request access from other existing ad accounts up to five ad accounts for each Meta Business Suite account.


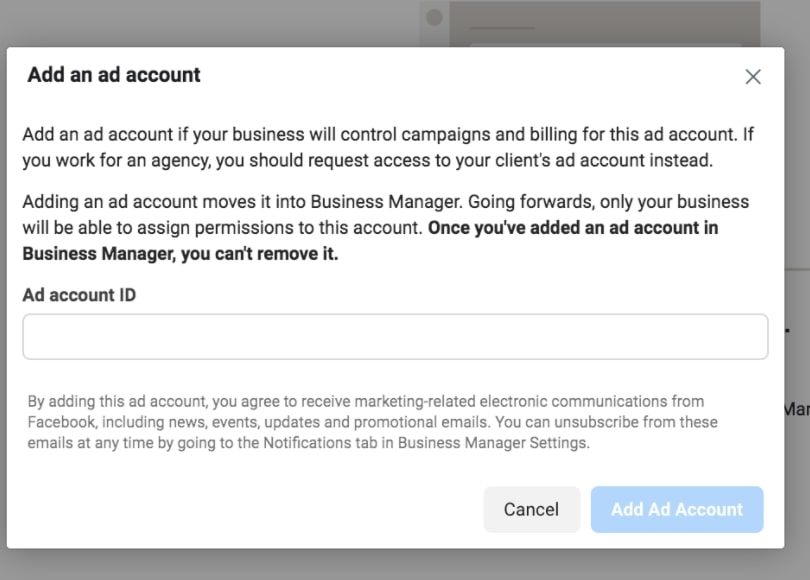
Option 2: If you wish to add an Ad account, select the “Add an Ad account” button then insert your “Ad Account ID” which you can find in Ads Manager and you are ready to proceed with “Add Ad Account”.
Option 3: If your client has an Ad account that requires you to manage, be sure to request admin access to the Ad account. After receiving access, simply insert your client’s business name or account ID to “Add”.

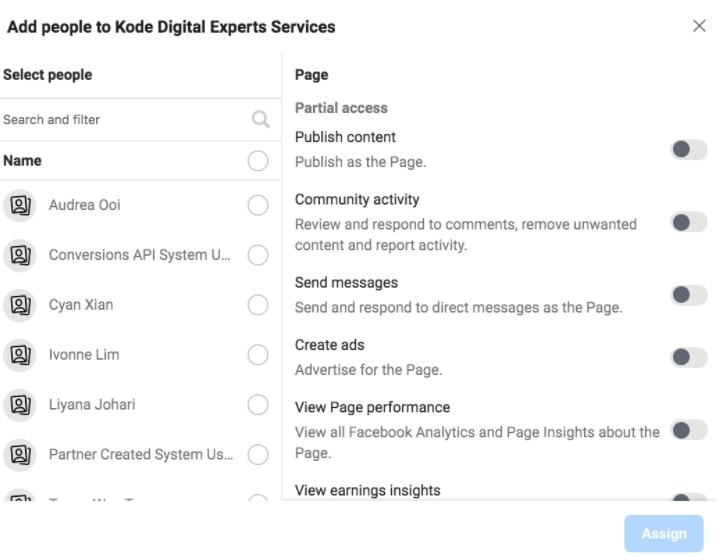
Next, start adding people and grant them access to control Meta pages and ad accounts. Select “Add People” and insert their name or email address. You may also choose which pages you prefer your team members to work on. Lastly, select “Assign” to send them an invitation to accept the role to your Meta page.

Here are some common errors you should keep in mind when installing Meta Business Suite.
1. Granting access to the wrong user. Be sure to check who has access to your business page and assign them with the right roles. And only by then, provide admin access to those you trust and require actual access. There are numerous roles that you can choose such as – Admin, Editor, Moderator, Advertiser, and Analyst.
2. If your team member has access to a Meta Business Account, that does not mean that your team member has been granted access to Meta Pages or Ad accounts, you will have to add your team member in each of the sections respectively; Meta Pages or Ad account.
3. Who is the owner of the Meta Business Page? Other than granting access, the most crucial step that you should always remember is who created the Meta Business Page. If you do not remember the owner of the Meta Business Page, you would not be able to grant anyone access to your business suite and ad accounts. There is indeed no other way to discover ownership on Meta even with the help of the support team with strict privacy purposes. Thus, be sure to remember the owner of your Meta Business Page.
That is it! Now that you are more familiar with why we strongly recommend leveraging your business’ social media marketing using Meta Business Suite. Start exploring your business page, set them up, and make the most of your Meta marketing efforts! Show off what you have got for the people and the world.
Get better with your social media campaigns with the 20 Do’s & Don’ts For Your Social Media.
If setting up Meta Business Suite sounds too technical and complicated for you, or if you’re looking for expert help to manage your Meta marketing and reach customers in the Klang area, contact Kode Digital to learn more about our digital marketing services in Klang, Kuala Lumpur. Our marketing experts can assist you with everything from initial setup to developing and implementing effective strategies.
Kode Digital is more than just a creative digital agency, we are also a Meta Business Partner. As a Meta Business Partner, Kode Digital has access to exclusive tools and resources that can help our clients get the most out of Meta’s platforms. Our team stays up-to-date on the latest marketing trends and best practices, including popular marketing formats like TikTok Video Content. Our goal is to elevate your brand and help to grow your business.
353-3 Jalan C. Y. Choy,
10300 Georgetown,
Penang, Malaysia.
A-16-8 Tropicana Avenue,
No 12 Persiaran
Tropicana, PJU 3, 47410
Petaling Jaya, Selangor.